This post shows you stunning Easter egg decoration techniques to try out this year! From traditional dyeing methods to modern design trends, learn easy ways to create beautiful Easter eggs that are perfect for both beginners and experts.

Over 180 million eggs are decorated each Easter season. I remember having an egg decorating party as a child for my birthday and I’m excited to share some special techniques that will make your Easter eggs stand out this year. Let’s dive into some egg-cellent decorating adventures!
Natural Dye Easter Eggs
Step away from artificial colours and embrace the beauty of nature! Creating dyes from ingredients like red cabbage, turmeric, and beet juice not only produces stunning colours but also makes for a safer, eco-friendly decorating experience. The secret to achieving vibrant natural colours lies in letting your eggs soak longer than with traditional dyes – patience truly pays off here. These natural dyes create unique, muted tones that artificial colours simply can’t match. Pro tip: Add vinegar to your dye bath to help the colours adhere better to the eggshells.
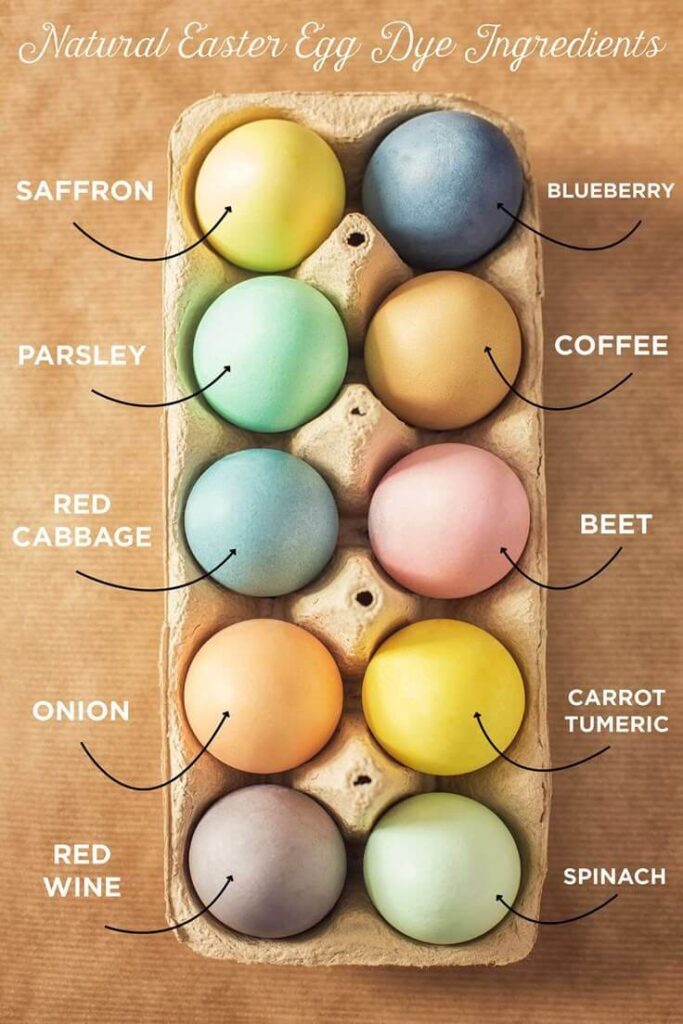
Credit: Pinterest
Marbled Easter Eggs
Create stunning swirled patterns using shaving cream and food colouring! This technique produces unique, never-repeated patterns that look professionally done. Start with white eggs and create a shallow bed of shaving cream mixed with drops of food colouring. The key is to swirl the colours gently without over-mixing. Let the eggs dry completely before handling to ensure the pattern sets properly.
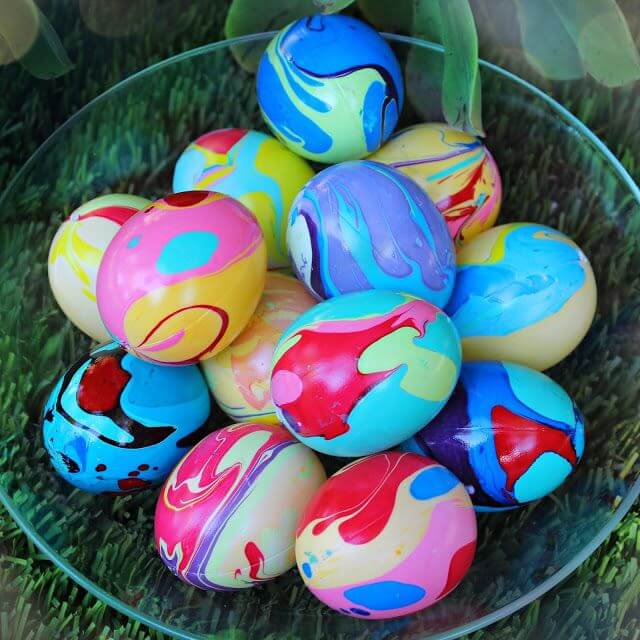
Credit: Pinterest
Washi Tape Designs
Transform plain eggs into geometric masterpieces using colourful washi tape! This no-mess technique is perfect for those who want precision without the fuss of dyes. Create stripes, triangles, or complex patterns by carefully applying different tape designs. The best part? If you make a mistake, you can easily peel off the tape and start again. Remember to smooth out any bubbles for clean lines.
Credit: Pinterest
Watercolour Easter Eggs
Create soft, dreamy effects using watercolour paints on white eggs. Start with a white base and apply diluted watercolours with a small brush for a delicate, artistic finish. The trick is to build up the colour gradually in layers. Add small speckles using a toothbrush for extra texture and interest. This technique works beautifully for creating ombré effects.
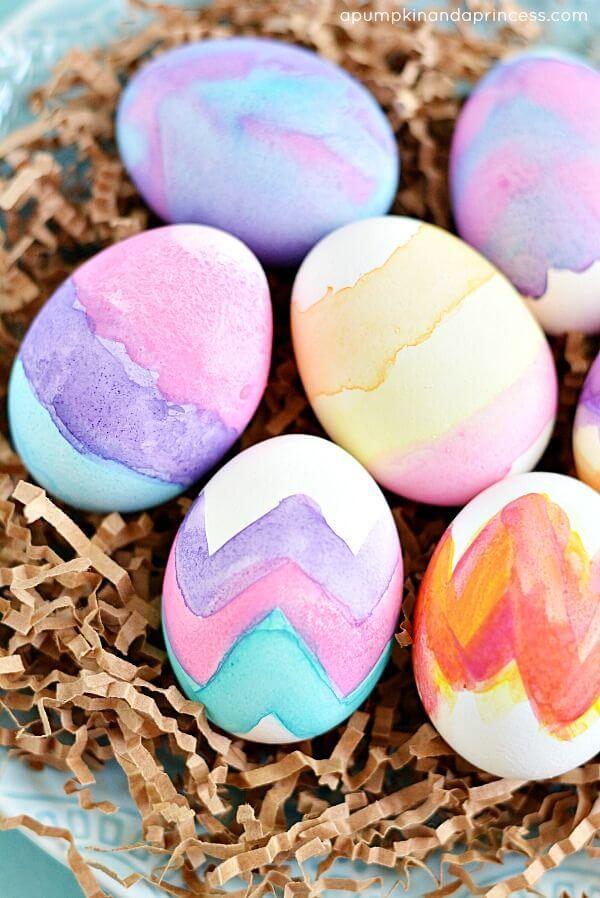
Credit: Pinterest
Pressed Flower Eggs
Bring spring’s beauty directly onto your eggs with pressed flowers! Collect and press small flowers and leaves ahead of time. Apply them carefully to white eggs using decoupage glue for a botanical look. The secret is using very thin, well-pressed flowers and working slowly. These eggs look particularly stunning displayed in natural baskets.
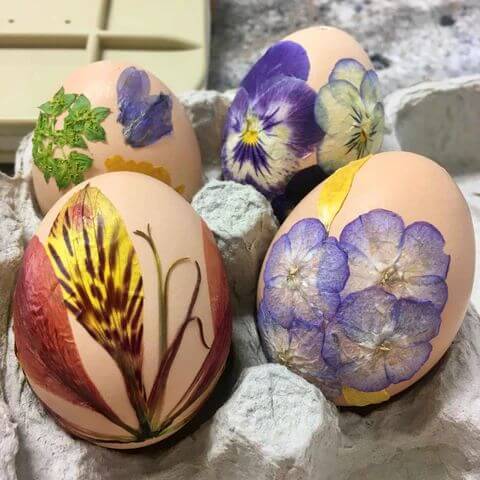
Credit: Pinterest
Modern Minimalist Eggs
Create sophisticated designs using simple patterns and a limited colour palette. Think geometric shapes, dots, or clean lines in black and gold on white eggs. Use paint pens for precise application and clean edges. This style works particularly well for contemporary Easter displays. Keep your designs balanced by not overcrowding the egg surface.
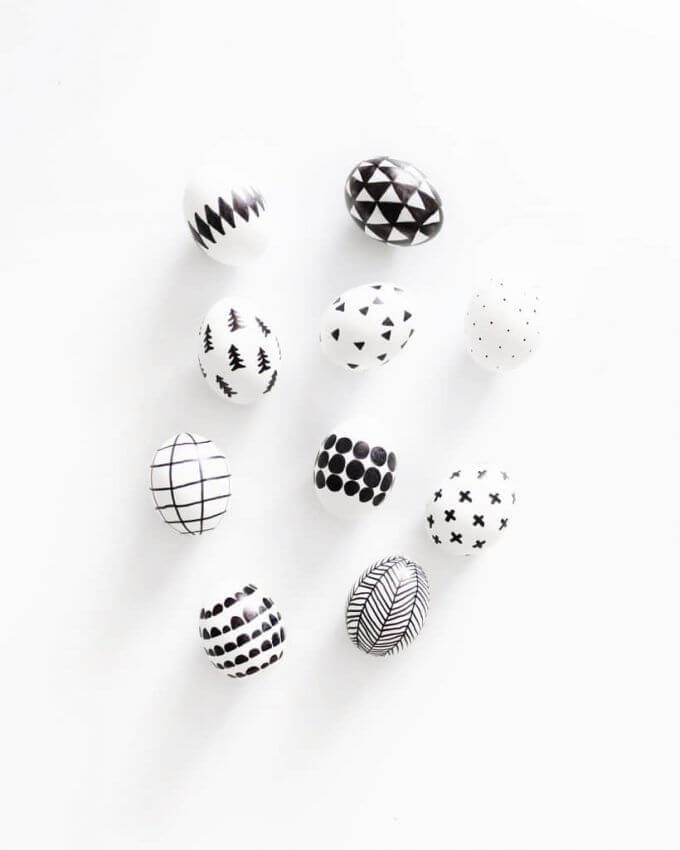
Credit: Pinterest
Metallic Foil Eggs
Add glamour to your Easter display with metallic foil decorations! Apply adhesive in your desired pattern, then carefully lay gold, silver, or copper foil over it. The key is working with small pieces of foil at a time for the best control. These eggs catch the light beautifully and make stunning centrepieces. Consider mixing metallic effects with solid colours for contrast.
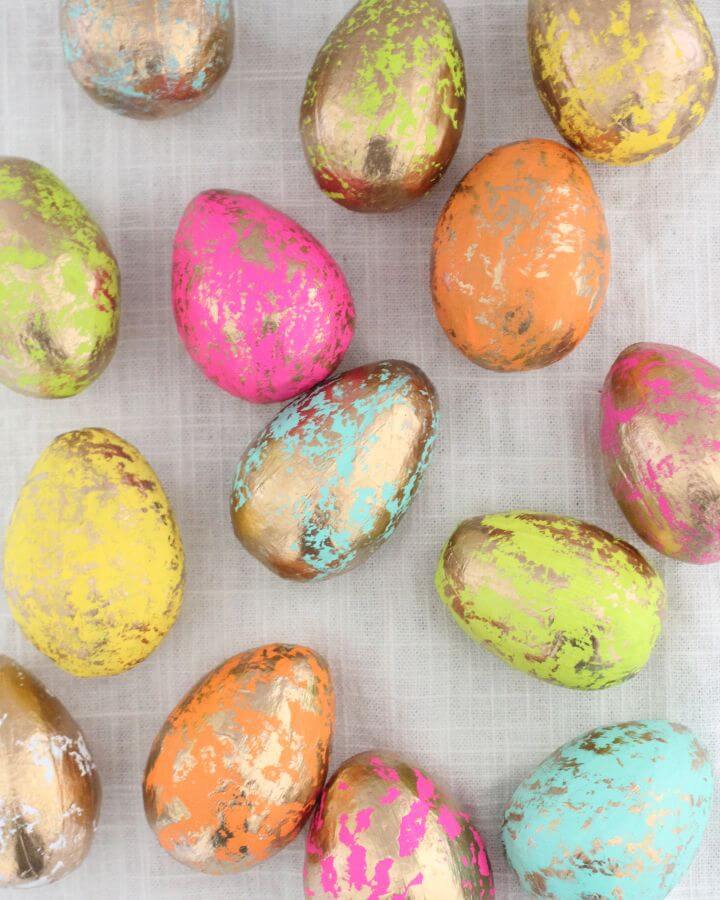
Credit: Pinterest
Speckled Robin’s Eggs
Create nature-inspired speckled eggs using blue dye and brown paint. Start with a pale blue base colour, then flick brown paint using a stiff brush for realistic speckles. The secret is building up the speckles gradually and varying their size. These eggs look particularly effective mixed with naturally coloured eggs in your display.
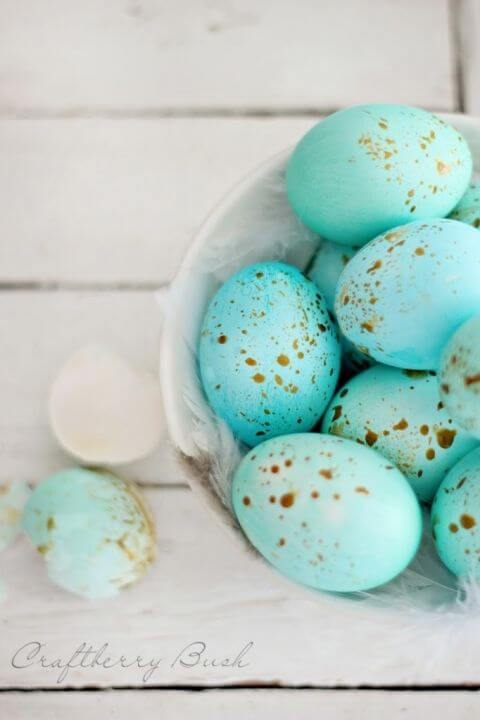
Credit: Pinterest
Typography Easter Eggs
Add personality with modern typography and quotes! Use letter stickers or carefully hand-letter your eggs with paint pens. Choose meaningful words or fun Easter phrases to create conversation pieces. Keep the background simple to let your text stand out. These make particularly great place settings for Easter dinner.

Credit: Pinterest
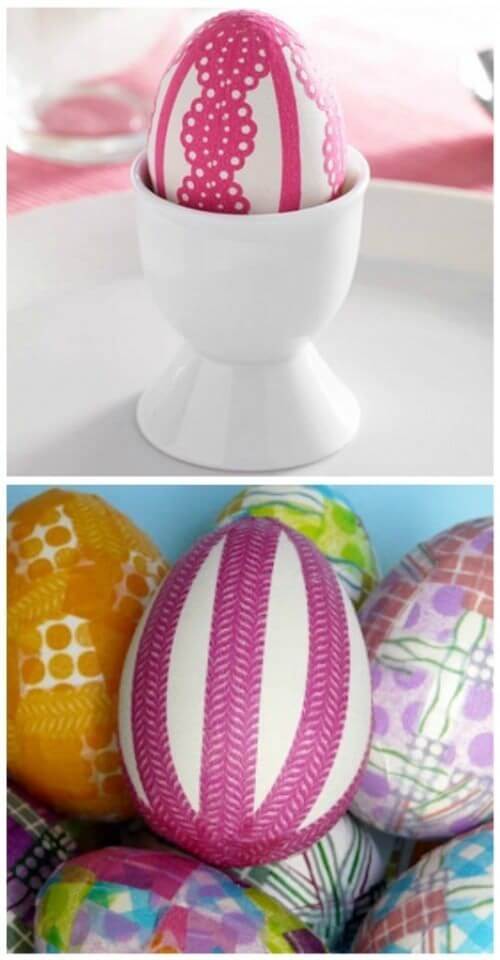
Lace Pattern Eggs
Create delicate patterns using lace and spray dye! Wrap eggs tightly with lace before applying colour for a beautiful impressed pattern. The key is selecting lace with distinct patterns and securing it firmly. These eggs look particularly elegant in pastel colours. Consider using different lace patterns for variety in your collection.
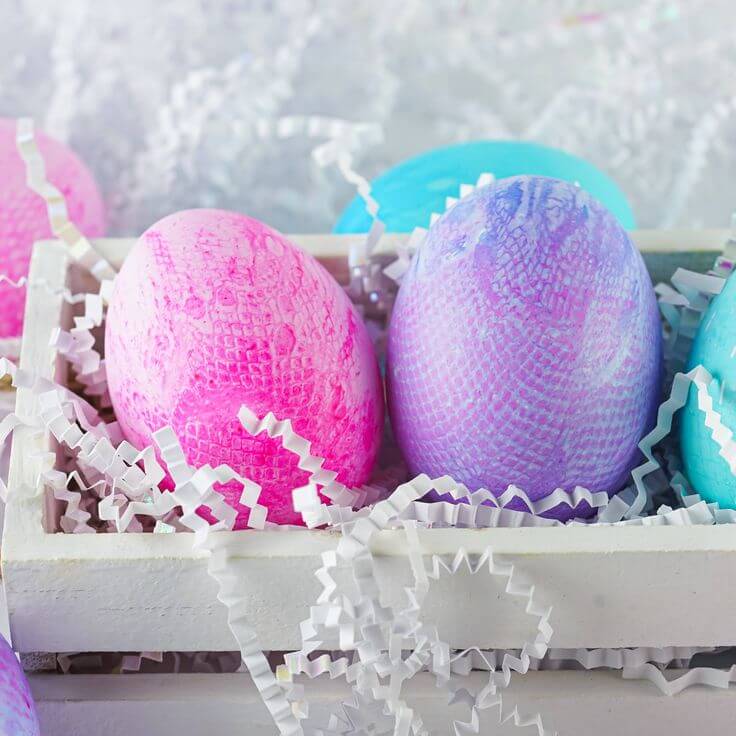
Credit: Pinterest
String Art Eggs
Wrap colourful threads around eggs for a unique dimensional effect! Start with a base colour and carefully wind embroidery thread in patterns. The secret is securing your thread ends well and varying the tension for different effects. Alternatively, you can blow up mini balloons and pop them after the thread has dried for a transparent effect. These eggs add wonderful texture to your Easter display. Consider using metallic threads for extra sparkle.
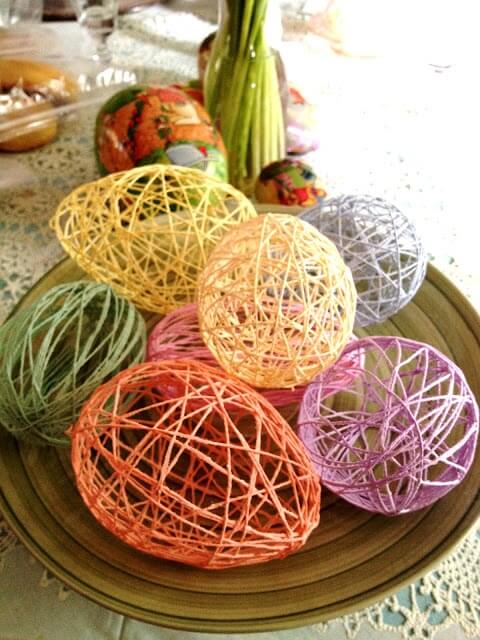
Credit: Pinterest
Glitter Dipped Eggs
Create glamorous eggs with a glitter-dipped effect! Apply glue to the bottom portion of your eggs and dip in fine glitter. The key is creating a clean line between the glitter and plain sections. These eggs add wonderful sparkle to your Easter decorations. Use different colours of glitter for variety.
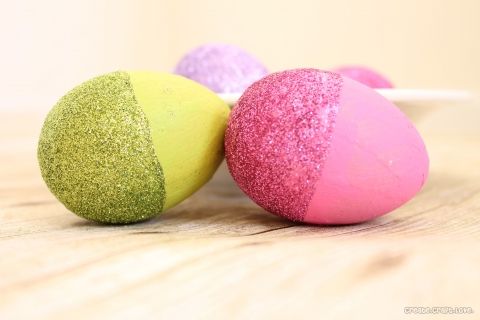
Credit: Pinterest
Silhouette Sticker Easter Eggs
Create dramatic designs using vinyl stickers! Apply your stickers and ensure they are well secured. These eggs work particularly well with traditional Easter motifs like bunnies and chicks. Consider layering different colours for more complex designs.
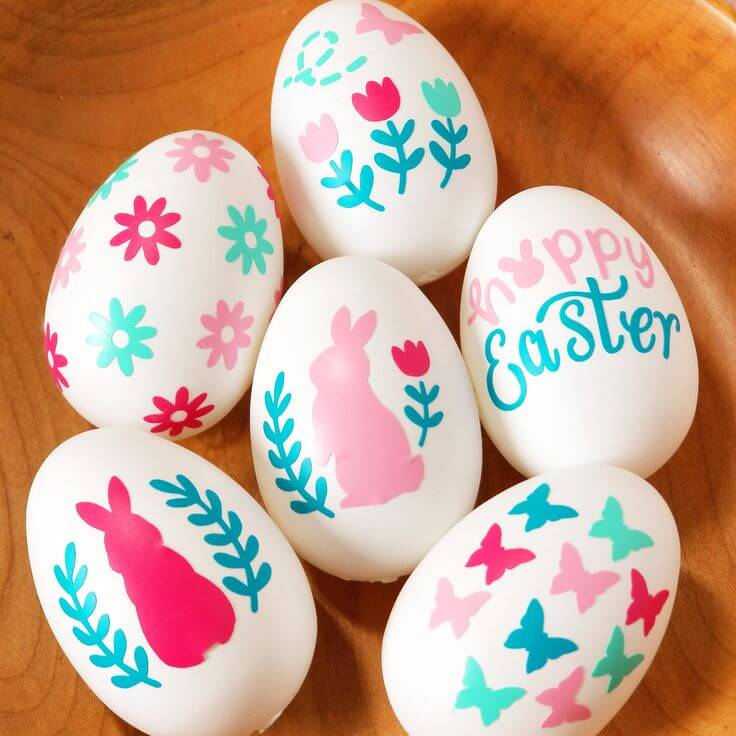
Credit: Pinterest
Painted Pattern Eggs
Let your creativity flow with freehand painted patterns! Use acrylic paints and fine brushes to create your own unique designs. The secret is building up patterns gradually and working around the egg systematically. These eggs allow for complete creative freedom and personal expression. Consider practicing your patterns on paper first.
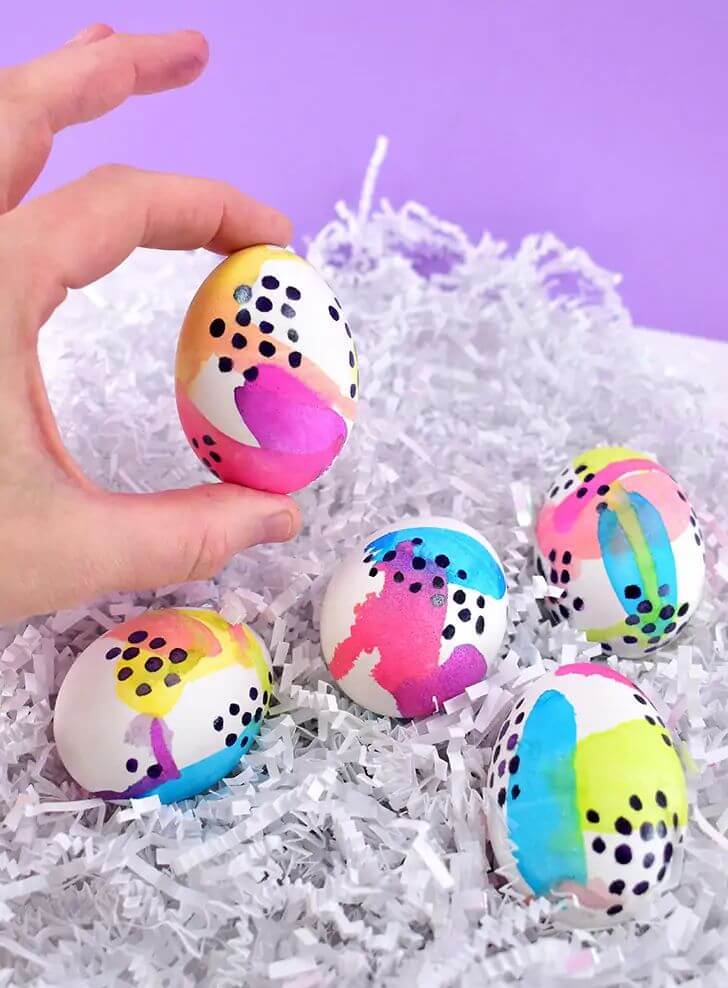
Credit: Pinterest
Embossed Easter Eggs
Create texture and dimension using embossing techniques! Apply embossing powder to adhesive designs and heat to create raised patterns. The key is working in small sections and heating carefully to avoid overheating the egg. These eggs add a wonderful interest to your Easter display. Consider mixing embossed and smooth sections for contrast.
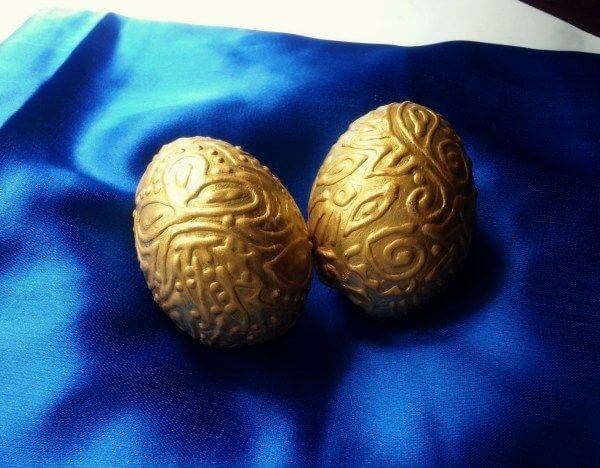
Credit: Pinterest

Whether you’re creating Easter eggs for a special hunt or crafting beautiful decorations for your home, these techniques offer something for everyone! From natural dyes to modern metallic designs, let your creativity shine through in every egg you decorate. Remember, perfect symmetry isn’t the goal – it’s about enjoying the creative process and making something unique.
This post shows you stunning Easter egg decoration techniques to try out this year.